Featured framework
Carbon for modern Rust servers
Fast, self-updating, and built for performance with seamless in-game plugin and server management.
1,500+
servers powered by Carbon
AdminWarn is designed for situations where players clearly violate server rules or require a direct and serious warning.
With the latest update, an optional popup warning mode has been added alongside the mandatory acknowledgment GUI.
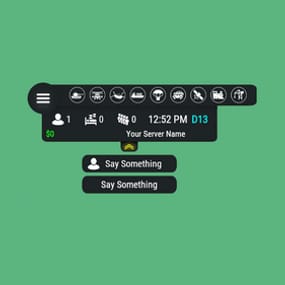
This allows admins to send clean, non-intrusive messages displayed at the top of the screen.
News: To avoid disrupting gameplay (such as PvP), you can use:
/warnpopup <SteamID> <message>
/warnpopupall <message>
The core purpose of AdminWarn remains unchanged: forcing players to acknowledge warnings.
Each mandatory warning includes a single confirmation button, ensuring the player has read and accepted it.
Acknowledgment events are tracked via Discord webhook logs, including whether the warning was confirmed while the player was online or after reconnecting.
AdminWarn is built for manual use only.
It is not an automated warning system.
All warnings are intentionally sent by admins using commands.
At the same time, the system works intelligently in the background:
- Warnings sent to offline players are stored and automatically shown when they next join, even days later.
- For online players, warnings remain active until acknowledged, then are automatically cleared.
- All data is fully wipe-aware and automatically cleaned on server wipes.
Each warning includes built-in in-game sound effects.
No external or custom audio files are used.
This is not a chat message.
Warnings are delivered as visual UI elements that require acknowledgment or appear as optional popup notifications.
Even if a player closes the game, mandatory warnings will reappear on the next login until confirmed.
No movement restrictions are applied.
Warnings can be sent via:
- RCON
- Server console
- In-game admin console (F1)
🚀 Performance:
AdminWarn is built with an optimized and efficient code structure, making its presence virtually unnoticeable on the server.
It runs smoothly during long uptimes and maintains stable hook memory and performance values under normal server conditions.
🔄 Wipe Behavior:
- Restarts: Data preserved (approved warnings are auto-deleted for data optimization)
- Server wipe: All warning data automatically cleared
- No manual cleanup needed (Most of the time, it is not necessary)
🔧 Commands Chat & Rcon:
Note: Player names are not unique and may include different alphabets or special characters. To avoid ambiguity, using Steam64ID is strongly recommended when sending warnings.
warn <SteamID> <message>
warn <PlayerName> <message>
warn <SteamID1>,<SteamID2>,<SteamID3> <message>
warn <Name1>,<Name2>,<Name3> <message>
warnall <message>
warnpopup <SteamID> <message>
warnpopup <PlayerName> <message>
warnpopup <SteamID1>,<SteamID2>,<SteamID3> <message>
warnpopup <Name1>,<Name2>,<Name3> <message>
warnpopupall <message>
🔐 Permissions Oxide/Carbon
oxide.grant group admin adminwarn.admin
c.grant group admin adminwarn.admin
📊 Discord Webhook Logging
- Player name/steamid and SteamURL
- Warning message / Timestamp
- Read status (online/after reconnect)
- Logs warning sending
- Logs individual warning acknowledgements
📁 Config:
{
"Warning sound": "assets/prefabs/building/wall.frame.shopfront/effects/metal_transaction_complete.prefab",
"Clear data on wipe": true,
"Discord Webhook URL": "https://support.discord.com/hc/en-us/articles/228383668-Intro-to-Webhooks",
"Discord Log Enabled": true,
"Log Global Warnings (warnall)": true,
"Log Warning Sent (single + multi)": true,
"Show Date in GUI": true,
"Show logo in warning GUI": true,
"Logo size (px) — local image should be a square PNG, recommended 75-120": 90,
"Use local images (false = use Web URL below)": true,
"Web image URL for logo (128x128 transparent PNG recommended, used only when Use local images is false)": "",
"Popup duration (seconds)": 10
}
Custom Smelt Item
Custom Smelt Item is an all-in-one plugin that allows you to add smeltable items, fuel items, and freely set the processing speed of each furnace. Create a unique gameplay experience with new smelting recipes, fuel items, and smelting speed adjustments! Compatible with Oxide. Installing this mod will change the smelting system from the vanilla version.
⚠️Note
This data includes "Custom Smelt Item" and "Custom Smelt Item Experimental." Please install only one of them.
"Custom Smelt Item" functions as a stable version, while "Custom Smelt Item Experimental" functions as a Experimental version.
"Custom Smelt Item Experimental" allows you to set additional foods, but please make sure you understand how to use this mod before using it. If there are many reports of bugs caused by incorrect use, we will discontinue releasing the Experimental version.
Custom Smelt Item Experimental will turn off the visuals of food places in campfires, etc.
Read below for instructions on how to use it.
■ Custom Smelting Items
- Set any item to be smelted
- Freely configure input/output items
- Set processing time for each item
- Set output amount per processing
- Support for skinned items (SkinID)
- Custom name settings for output items
- Item type classification for each furnace type (ore, oil)
■ Custom Fuel System
- Add any item as fuel
- Set burn time for each fuel
- Set by-product output (e.g., wood → charcoal)
- Adjust by-product drop rate
- Support for skinned fuel items
■ Furnace Speed Multiplier
Individual speed settings for each furnace type(Custom Smelt Item)
- Furnace
- Legacy Furnace
- Large Furnace
- Electric Furnace
- Small Oil Refinery
Notice : The speed cannot be adjusted for any other types. The speed for all other types is set to 1. This setting is to adjust the interaction between fuel and cooking time. (Custom Smelt Item Only)
You can fully customize the config, adding refined items, fuel items, refinement speed, and more.
*Please do not delete default items from the settings.
Custom Smelting Item
{
"Smelting Patterns": [
{
"ItemType": "oil", ///ore" (for furnaces) or "oil" (for refineries)
"InputItem": "crude.oil", ///Input item short name
"InputItemSkinId": 0, ///Input item skin ID
"OutputItem": "lowgradefuel", ///Output item short name
"OutputItemSkinId": 0, ///Output item skin ID
"OutputItemName": null, ///Custom display name for the output item (null for default)
"RequiredTime": 30, ///Smelting time (seconds)
"OutputAmountPerProcess": 3 ///Output amount per 1
},
{
"ItemType": "oil",
"InputItem": "diesel_barrel",
"InputItemSkinId": 0,
"OutputItem": "lowgradefuel",
"OutputItemSkinId": 0,
"OutputItemName": null,
"RequiredTime": 180,
"OutputAmountPerProcess": 150
},
{
"ItemType": "ore",
"InputItem": "metal.ore",
"InputItemSkinId": 0,
"OutputItem": "metal.fragments",
"OutputItemSkinId": 0,
"OutputItemName": null,
"RequiredTime": 10,
"OutputAmountPerProcess": 1
},
{
"ItemType": "ore",
"InputItem": "sulfur.ore",
"InputItemSkinId": 0,
"OutputItem": "sulfur",
"OutputItemSkinId": 0,
"OutputItemName": null,
"RequiredTime": 7,
"OutputAmountPerProcess": 1
},
{
"ItemType": "ore",
"InputItem": "hq.metal.ore",
"InputItemSkinId": 0,
"OutputItem": "metal.refined",
"OutputItemSkinId": 0,
"OutputItemName": null,
"RequiredTime": 20,
"OutputAmountPerProcess": 1
},
{
"ItemType": "ore",
"InputItem": "can.tuna.empty",
"InputItemSkinId": 0,
"OutputItem": "metal.fragments",
"OutputItemSkinId": 0,
"OutputItemName": null,
"RequiredTime": 20,
"OutputAmountPerProcess": 10
},
{
"ItemType": "ore",
"InputItem": "can.beans.empty",
"InputItemSkinId": 0,
"OutputItem": "metal.fragments",
"OutputItemSkinId": 0,
"OutputItemName": null,
"RequiredTime": 25,
"OutputAmountPerProcess": 15
},
{
"ItemType": "ore",
"InputItem": "honeycomb",
"InputItemSkinId": 0,
"OutputItem": "honey",
"OutputItemSkinId": 0,
"OutputItemName": null,
"RequiredTime": 3,
"OutputAmountPerProcess": 1
},
{
"ItemType": "ore",
"InputItem": "techparts",
"InputItemSkinId": 0,
"OutputItem": "metal.refined",
"OutputItemSkinId": 0,
"OutputItemName": null,
"RequiredTime": 120,
"OutputAmountPerProcess": 10
},
{
"ItemType": "ore",
"InputItem": "sheetmetal",
"InputItemSkinId": 0,
"OutputItem": "metal.fragments",
"OutputItemSkinId": 0,
"OutputItemName": null,
"RequiredTime": 180,
"OutputAmountPerProcess": 150
},
{
"ItemType": "ore",
"InputItem": "scrap",
"InputItemSkinId": 0,
"OutputItem": "metal.fragments",
"OutputItemSkinId": 0,
"OutputItemName": null,
"RequiredTime": 15,
"OutputAmountPerProcess": 10
}
],
"Fuel Patterns": [
{
"FuelInputItem": "wood", ///Fuel item short name
"FuelInputItemSkinId": 0, ///Fuel item skin ID
"FuelOutputItem": "charcoal", ///By-product item (null if none)
"FuelOutputItemSkinId": 0, ///By-product skin ID (default is 0)
"FuelOutputItemName": null, ///Custom by-product Display name
"FuelOutputAmountPerProcess": 1, ///By-product amount per fuel consumed
"FuelOutputChance": 0.7, ///By-product generation probability (0.0-1.0)
"FuelBurnTime": 10 ///Burn time per fuel (seconds)
},
{
"FuelInputItem": "lowgradefuel",
"FuelInputItemSkinId": 0,
"FuelOutputItem": null,
"FuelOutputItemSkinId": 0,
"FuelOutputItemName": null,
"FuelOutputAmountPerProcess": 0,
"FuelOutputChance": 0.0,
"FuelBurnTime": 80
},
{
"FuelInputItem": "coal",
"FuelInputItemSkinId": 0,
"FuelOutputItem": null,
"FuelOutputItemSkinId": 0,
"FuelOutputItemName": null,
"FuelOutputAmountPerProcess": 0,
"FuelOutputChance": 0.0,
"FuelBurnTime": 180
},
{
"FuelInputItem": "charcoal",
"FuelInputItemSkinId": 0,
"FuelOutputItem": null,
"FuelOutputItemSkinId": 0,
"FuelOutputItemName": null,
"FuelOutputAmountPerProcess": 0,
"FuelOutputChance": 0.0,
"FuelBurnTime": 60
},
{
"FuelInputItem": "cloth",
"FuelInputItemSkinId": 0,
"FuelOutputItem": null,
"FuelOutputItemSkinId": 0,
"FuelOutputItemName": null,
"FuelOutputAmountPerProcess": 0,
"FuelOutputChance": 0.0,
"FuelBurnTime": 30
},
{
"FuelInputItem": "plantfiber",
"FuelInputItemSkinId": 0,
"FuelOutputItem": null,
"FuelOutputItemSkinId": 0,
"FuelOutputItemName": null,
"FuelOutputAmountPerProcess": 0,
"FuelOutputChance": 0.0,
"FuelBurnTime": 120
}
],
"Oven Speed Multipliers": { ///Furnace Smelt Speed
"Furnace": 1.0,
"Legacy Furnace": 1.0,
"Large Furnace": 2.0,
"Electric Furnace": 2.0,
"Small Oil Refinery": 3.0
}
}
Custom Smelt Item Experimental
{
"Can Cook In Furnace": false, ///Can food be cooked in a furnace?
"Smelting Patterns": [
{
{
"ItemType": "food", ///"ore" or "oil" or "food"
"InputItem": "mushroom",
"InputItemSkinId": 0,
"OutputItem": "apple",
"OutputItemSkinId": 3347673417,
"OutputItemName": "Cooked Mushroom",
"RequiredTime": 30,
"OutputAmountPerProcess": 1
},
{
"ItemType": "food",
"InputItem": "seed.corn",
"InputItemSkinId": 0,
"OutputItem": "apple",
"OutputItemSkinId": 3154577332,
"OutputItemName": "Popcorn",
"RequiredTime": 30,
"OutputAmountPerProcess": 1
}
...
],
"Fuel Patterns": [
{
"FuelInputItem": "wood",
"FuelInputItemSkinId": 0,
"FuelOutputItem": "charcoal",
"FuelOutputItemSkinId": 0,
"FuelOutputItemName": null,
"FuelOutputAmountPerProcess": 1,
"FuelOutputChance": 0.7,
"FuelBurnTime": 10
},
...
],
"Oven Speed Multipliers": {
"Furnace": 1.0,
"Legacy Furnace": 1.0,
"Large Furnace": 2.0,
"Camp Fire": 1.0,
"Cursed Cauldron": 1.0,
"Skull Fire Pit": 1.0,
"Stone Fireplace": 1.0,
"Hobo Barrel": 1.0,
"Barbeque": 2.0,
"Cooking Workbench": 2.0,
"Electric Furnace": 2.0,
"Small Oil Refinery": 3.0
}
}
■ Configuration Option Details
ItemType: Item type: "ore" (for furnaces) or "oil" (for refineries)
InputItem: Input item short name
InputItemSkinId: Input item skin ID
OutputItem: Output item short name
OutputItemSkinId: Output item skin ID
OutputItemName: Custom display name for the output item (null for default)
RequiredTime: Refining time (seconds)
OutputAmountPerProcess: Output amount per unit
■ Fuel Pattern Settings
FuelInputItem - Fuel item short name
FuelInputItemSkinId - Fuel item skin ID
FuelOutputItem - By-product item (null if none)
FuelOutputItemSkinId - By-product skin ID (default is 0)
FuelOutputItemName - Custom by-product name
FuelOutputAmountPerProcess - By-product amount per fuel consumed
FuelOutputChance - By-product generation probability (0.0-1.0)
FuelBurnTime - Burn time per fuel (seconds)
Important Notes
- Food items (raw meat, fish, etc.) cannot be set as smelting items in Custom Smelt Items, as they maintain vanilla cooking behavior.
- Custom Smelt Item Only : Furnace speed cannot be adjusted for other types. All other types have the speed set to 1. This setting is to adjust the interaction between fuel and cooking time.
- The same item cannot be set as both a smelting item and a fuel item.
- The same item cannot be assigned to multiple item types (ore + oil).
- Fuel settings can only be used for smelting. Vehicle fuel consumption settings cannot be configured.
- The fuel used for vehicles cannot be customized with this mod.
- Please note that compatibility with other mods is not supported.
⚠️⚠️⚠️Important: How to Use Custom Smelt Items (Experimental)⚠️⚠️⚠️
To stop using this mod and keep the server running, you must remove all custom food items from the input slots of the cookable ovens. Before removing this mod, be sure to run the server console command (or reinstall the mod and then run the server console command again).
Failure to perform this step will prevent the server from starting.
Also, absolutely do not save the server in this state; it will corrupt the server save data.
Target Type
Campfire
Cursed Cauldron
Fireplace
Hobo Barrel
BBQ
Cooking Workbench
Console Command : removefood
When you run the command, a confirmation message will appear. Enter "y" if you agree. Then, remove this mod.
VOID / NINJA WORKS
DISCORD : https://discord.gg/U8uxePjSyA
MADE IN JAPAN
This is a custom package designed by us, featuring 210 unique bases and a specialized loot setup for five different difficulty levels, ranging from Easy to Nightmare.
Note: The building skins in the package showcase images may differ from the spawned bases or use the default building skin.
This MEGA PACK is an upgraded version of the FullWiped-110 Bases + Loot Pack we previously offered. If you've already purchased the FullWiped-110 Bases + Loot Pack, you only need to buy the expansion pack, which includes 100 new bases ranging from Easy to Hard. Get it here: https://codefling.com/bases/raidable-bases-pack-100-bases-expanded-package-from-easy-to-hard
Warning: The Raidable Bases plugin requires the Copy Paste plugin to function. You must install both for this bases pack to work.
🔗Raidable Bases (Paid): https://codefling.com/plugins/raidable-bases
🔗Copy Paste (Free): https://umod.org/plugins/copy-paste
This Raidable Bases Pack & Loot Tables package includes:
🏡70 Easy Bases +🗡️Base_Loot Tables (Easy "Vanilla" and "Enhanced" tables included)
🏡60 Medium Bases +🗡️Base_Loot Tables (Medium "Vanilla" and "Enhanced" tables included)
🏡60 Hard Bases +🗡️Base_Loot Tables (Hard "Vanilla" and "Enhanced" tables included)
🏡10 Expert Bases +🗡️Base_Loot Tables (Expert "Vanilla" and "Enhanced" tables included)
🏡10 Nightmare Bases +🗡️Base_Loot Tables (Nightmare "Vanilla" and "Enhanced" tables included)
Beware: Our loot table package includes only the 5-tier loot tables within the Base_loot folder, ranging from easy to nightmare.
It does not include the loot tables from the Difficulty_Loot or Weekday_Loot folders.
VANILLA AND ENHANCED LOOT TABLES FOR RAIDABLE BASES
This package includes 10 different base loot table files, ensuring a well-structured and advanced configuration for every difficulty level, from Easy to Nightmare.
- 5 loot files for the Vanilla setup (Easy, Medium, Hard, Expert, Nightmare), offering a balanced loot experience with some junk items, staying close to a 1x rate.
- 5 loot files for the Enhanced setup (Easy, Medium, Hard, Expert, Nightmare), designed for modded servers with 2x, 3x, or higher gather rates, featuring cleaner loot tables with minimal junk and more valuable rewards.
📁Installation Path:
All loot table files are intended for the 📁/oxide/data/RaidableBases/Base_Loot directory.
⚠️Setup Requirement: You must choose and install only one loot table setup at a time—either Vanilla or Enhanced. If you want to switch, you can replace the current files with the other set, but both cannot be active simultaneously.
For those exclusively seeking the loot table, we offer it as a standalone product: https://codefling.com/customizations/raidable-bases-loot-tables-pack
(Note: If you've purchased our Raidable Bases Mega Pack & Loot Tables (210 Bases) package, there is no need to buy this separately.)
WARNING: TWO DIFFERENT INSTALLATION METHODS
(PLEASE READ BOTH AND APPLY ONLY THE ONE THAT FITS YOUR NEEDS)
⚙️INSTALLATION GUIDE 1:
(If you do not have a custom configuration and are not a professional in server configurations, choose this option. However, if you already have your own configuration and profile settings and do not wish to use the optional configs we provide—in other words, if you only need the bases and loot tables—use the second installation guide instead.)
▶ Step 1: Place the Config File
From the extracted ZIP files, locate the config folder and find the RaidableBases.json file. Move it to the following directory:
📁/serverfiles/oxide/config
▶ Step 2: Place the Bases
From the extracted ZIP files, locate the copypaste folder and move it to the following directory:
📁/serverfiles/oxide/data
▶ Step 3: Place the Base_Loot Tables
From the extracted ZIP files, locate the Base_Loot folder and move it to the following directory:
📁/serverfiles/oxide/data/RaidableBases
Important: If there are any existing JSON files inside this folder that are not part of our loot tables, delete them to ensure proper functionality.
Choose between Vanilla or Enhanced loot tables based on your preference.
If the folder is named "Base_Loot (Enhanced loot)", remove the text in parentheses so that the correct folder name is simply: "Base_Loot" (Otherwise, the loot tables will not work properly.)
▶ Step 4: Place the Profiles Folder
From the extracted ZIP files, locate the profiles folder and move it to the following directory:
📁/serverfiles/oxide/data/RaidableBases
Why Are Profiles Important?
The profiles folder contains crucial settings that allow you to:
✔️ Enable/disable the dome
✔️ Enable/disable NPCs
✔️ Adjust the number of lootable items
These are just a few examples—there are dozens of important settings that directly affect how raid bases function. The config file alone is not enough—these files play a major role in customizing your raid bases.
⚡ I strongly recommend reviewing each difficulty setting (Easy to Nightmare) inside the profiles folder and adjusting them based on your needs.
▶ Step 5: Restart the plugin via RCON:
o.reload RaidableBases
⚙️INSTALLATION GUIDE 2:
(Use this installation method if you do not want to use our configurations and instead prefer to use your own config files and your own 📁/oxide/data/RaidableBases/Profiles configurations.)
In this case, you only need to add the bases. To do this, use the following commands in RCON:
▶ Step 1:
You can add bases one by one or in bulk.
After executing the commands in RCON, the bases will be registered inside the Profiles configuration.
If you do not want to deal with these adjustments, it is recommended to use Installation Guide 1 instead.
A- Example RCON commands:
rb.config add "Easy Bases" fullwipedeasy1
rb.config add "Hard Bases" fullwipedhard1
B- Commands to Integrate Raid Bases in Bulk via RCON:
rb.config add "Easy Bases" fullwipedeasy1 fullwipedeasy2 fullwipedeasy3 fullwipedeasy4 fullwipedeasy5 fullwipedeasy6 fullwipedeasy7 fullwipedeasy8 fullwipedeasy9 fullwipedeasy10 fullwipedeasy11 fullwipedeasy12 fullwipedeasy13 fullwipedeasy14 fullwipedeasy15 fullwipedeasy16 fullwipedeasy17 fullwipedeasy18 fullwipedeasy19 fullwipedeasy20 fullwipedeasy21 fullwipedeasy22 fullwipedeasy23 fullwipedeasy24 fullwipedeasy25 fullwipedeasy26 fullwipedeasy27 fullwipedeasy28 fullwipedeasy29 fullwipedeasy30 fullwipedeasy31 fullwipedeasy32 fullwipedeasy33 fullwipedeasy34 fullwipedeasy35 fullwipedeasy36 fullwipedeasy37 fullwipedeasy38 fullwipedeasy39 fullwipedeasy40 fullwipedeasy41 fullwipedeasy42 fullwipedeasy43 fullwipedeasy44 fullwipedeasy45 fullwipedeasy46 fullwipedeasy47 fullwipedeasy48 fullwipedeasy49 fullwipedeasy50 fullwipedeasy51 fullwipedeasy52 fullwipedeasy53 fullwipedeasy54 fullwipedeasy55 fullwipedeasy56 fullwipedeasy57 fullwipedeasy58 fullwipedeasy59 fullwipedeasy60 fullwipedeasy61 fullwipedeasy62 fullwipedeasy63 fullwipedeasy64 fullwipedeasy65 fullwipedeasy66 fullwipedeasy67 fullwipedeasy68 fullwipedeasy69 fullwipedeasy70
rb.config add "Medium Bases" fullwipedmed1 fullwipedmed2 fullwipedmed3 fullwipedmed4 fullwipedmed5 fullwipedmed6 fullwipedmed7 fullwipedmed8 fullwipedmed9 fullwipedmed10 fullwipedmed11 fullwipedmed12 fullwipedmed13 fullwipedmed14 fullwipedmed15 fullwipedmed16 fullwipedmed17 fullwipedmed18 fullwipedmed19 fullwipedmed20 fullwipedmed21 fullwipedmed22 fullwipedmed23 fullwipedmed24 fullwipedmed25 fullwipedmed26 fullwipedmed27 fullwipedmed28 fullwipedmed29 fullwipedmed30 fullwipedmed31 fullwipedmed32 fullwipedmed33 fullwipedmed34 fullwipedmed35 fullwipedmed36 fullwipedmed37 fullwipedmed38 fullwipedmed39 fullwipedmed40 fullwipedmed41 fullwipedmed42 fullwipedmed43 fullwipedmed44 fullwipedmed45 fullwipedmed46 fullwipedmed47 fullwipedmed48 fullwipedmed49 fullwipedmed50 fullwipedmed51 fullwipedmed52 fullwipedmed53 fullwipedmed54 fullwipedmed55 fullwipedmed56 fullwipedmed57 fullwipedmed58 fullwipedmed59 fullwipedmed60
rb.config add "Hard Bases" fullwipedhard1 fullwipedhard2 fullwipedhard3 fullwipedhard4 fullwipedhard5 fullwipedhard6 fullwipedhard7 fullwipedhard8 fullwipedhard9 fullwipedhard10 fullwipedhard11 fullwipedhard12 fullwipedhard13 fullwipedhard14 fullwipedhard15 fullwipedhard16 fullwipedhard17 fullwipedhard18 fullwipedhard19 fullwipedhard20 fullwipedhard21 fullwipedhard22 fullwipedhard23 fullwipedhard24 fullwipedhard25 fullwipedhard26 fullwipedhard27 fullwipedhard28 fullwipedhard29 fullwipedhard30 fullwipedhard31 fullwipedhard32 fullwipedhard33 fullwipedhard34 fullwipedhard35 fullwipedhard36 fullwipedhard37 fullwipedhard38 fullwipedhard39 fullwipedhard40 fullwipedhard41 fullwipedhard42 fullwipedhard43 fullwipedhard44 fullwipedhard45 fullwipedhard46 fullwipedhard47 fullwipedhard48 fullwipedhard49 fullwipedhard50 fullwipedhard51 fullwipedhard52 fullwipedhard53 fullwipedhard54 fullwipedhard55 fullwipedhard56 fullwipedhard57 fullwipedhard58 fullwipedhard59 fullwipedhard60
rb.config add "Expert Bases" fullwipedexp1 fullwipedexp2 fullwipedexp3 fullwipedexp4 fullwipedexp5 fullwipedexp6 fullwipedexp7 fullwipedexp8 fullwipedexp9 fullwipedexp10
rb.config add "Nightmare Bases" fullwipednight1 fullwipednight2 fullwipednight3 fullwipednight4 fullwipednight5 fullwipednight6 fullwipednight7 fullwipednight8 fullwipednight9 fullwipednight10
▶ Step 2: Place the Base_Loot Tables
From the extracted ZIP files, locate the Base_Loot folder and move it to the following directory:
📁/serverfiles/oxide/data/RaidableBases
Important: If there are any existing JSON files inside this folder that are not part of our loot tables, delete them to ensure proper functionality.
Choose between Vanilla or Enhanced loot tables based on your preference.
If the folder is named "Base_Loot (Enhanced loot)", remove the text in parentheses so that the correct folder name is simply: "Base_Loot" (Otherwise, the loot tables will not work properly.)
▶ Step 3: Restart the plugin via RCON:
o.reload RaidableBases
EXTRA IMPORTANT INFORMATIONS:
We do not use a dome, NPCs, or arena walls around raid bases on our servers, and in the ZIP file we provided, these features are also disabled by default. If you want to enable them, you will need to adjust the settings accordingly.
For example, to enable the dome, follow the steps below:
Navigate to:
📁/oxide/data/RaidableBases/Profiles
Open the files inside the Profiles folder with a text editor.
Locate the following settings:
(This is already set to false because it is required for markers to appear on the map.)
"Spawn Silently (No Notification, No Dome, No Map Marker)": false,
"Create Dome Around Event Using Spheres (0 = disabled, recommended = 5)": 0,
Change the value from 0 to 5 as shown below:
"Create Dome Around Event Using Spheres (0 = disabled, recommended = 5)": 5,
Additionally, the loot amount for bases varies depending on the difficulty level (easy, medium, hard, expert, and nightmare). You can adjust this setting in the same Profiles location according to your needs:
"Amount Of Items To Spawn": 210,
For example, in medium bases, this value is set to 210, which determines the total number of items that will appear in crates, furnaces, and the cupboard.
Our current configuration is specifically adjusted to prevent players from feeling overwhelmed by massive buildings right after a wipe. We have configured Maintained Events accordingly to ensure a balanced experience.
In our setup:
- Timed events and purchasable events are disabled.
- After a wipe, easy bases will start spawning 30 minutes later.
- Nightmare bases will begin spawning 48 hours (2 days) later.
Imagine starting the game with just a torch in hand and immediately encountering a nightmare base on the shore.
You’d likely quit the game right away—this setting is crucial for us to avoid such scenarios.
Configuration Example: 📁/serverfiles/oxide/config
"Maintained Events": {
"Always Maintain Max Events": true,
"Max Maintained Events": 30,
"Enable X Hours After Wipe (0 = immediately)": {
"Easy": 0.5,
"Medium": 1.0,
"Hard": 3.0,
"Expert": 24.0,
"Nightmare": 48.0
All of our bases from Easy to Nightmare are equipped with turret protection.
If you do not want turrets to spawn in your raidable bases on your server, you can use the following method.
Go to the file path /data/RaidableBases/Profiles, open the JSON files inside with a text editor, and apply the following:
"Kill These Prefabs After Paste": [
"assets/prefabs/npc/autoturret/autoturret_deployed.prefab",
"autoturret_deployed"
],
If you are satisfied with this package, you can support us by leaving a 5-star review on the site where you purchased it. Your feedback motivates us to continue improving and providing even better configurations for dedicated server owners like you.
Thank you! ❤️
$24.99
Skinner! The unrivaled no.1 performance skinning plugin. Skin any item in the game with a unique skinbox giving you live skinning, auto skinning and skin sets.
Thanks for everyone who has given feed back through the duration of the beta release. Skinner 3.0 is finally here!
Visual overhaul! - with dynamic UI menus for permission based player menus
Automatic skin filtering and dev modes for new TOS
Permission based skin sets
Team share skins!
Auto unlock owned skins!
and More!!!
Live Skinning - Skin items in place without moving them
Auto import - Automatically import and use all game approved skins
Skin Sets - Create a variety of different skin sets for any item
Skin Requests - Allows players to request and Admins to accept new skins in game
Auto Skins - Automatically apply selected skins to every item that enters your inventory
Skinner 2.0 offers unrivaled performance in plugin efficiency. Our standard testing shows runtime results were 60x faster and memory usage was 200x more efficient than the closest peforming plugin.
SkinMenu Commands:
/Skin or /S - Live skin any item in your inventory by selecting a skin you wish to apply
/SkinCraft or /Sc - Create multiple skin sets for use in other functions such as skinauto or skinteam
/Skinitem or /Si - Skin a deployable item you are looking at ingame.
Args - Spectify 1, 2 or 3 to automatically use a skin set.
Automatic Commands:
/Skincon or /scon - sets all items in a container you are looking at to your default craft set
Args - Optional, spectify 1, 2 or 3 to automatically use a skin set.
/Skininv or /sinv - sets all items in your inventory to your default craft set
Args - Optional, spectify 1, 2 or 3 to automatically use a skin set.
/Skinauto or /Sauto - Automatically apply selected skins to every item that enters your inventory based off your skin sets.
Args - Optional, spectify 1, 2 or 3 to automatically use a skin set.
/Skinteam or /st - sets all items in your inventory and your teams to your default craft set
Args - Optional, spectify 1, 2 or 3 to automatically use a skin set.
Toggle - Use /skinteam toggle to opt in or out of the team skin set
/SkinBase - Allows you to skin all deployables in your base to your default skincraft skins.
Args - Optional, specify item name to filter items being skinned example: /Skinbase sleepingbag to only skin sleeping bags.
/SkinAll Command - Skin all the items in all the containers in your base.
Args - Optional, specify item by shortname example: /SkinAll rifle.ak to only skin ak47's.
Skin Import Commands:
/Skinimport or /sip - Import custom workshop skins
Args - WorkshopID example: /Skinimport 2397648701
/Colimport or /cip - Import custom workshop collection using /skinimport collectionID
Args - Collection ID example: /Colimport 2921147807
/Skinrequest or /Sr - Request a skin to be added to skinner, requested skins will show in the /Skinrequests UI for approval
Args - WorkshopID example: /Skinrequest 2397648701
/Skinrequests or /Srs - Opens the the skinner menu with a box of skins awating approval
Button Usage - Select an option and remove the skin to enact the process
Try - Recieve a copy of an item with that skin
Approve - Adds the skin from the menu to the imported skins list
Deny - Removes the skin
Note: All chat commands are universal meaning they can be used via the console, rcon(for import commands) and can be customized via the configuration.
Player Permissions:
Skinner.default - enables /skin command
Skinner.items - enables /skinitem command
Skinner.craft - enables /skincraft command
Skinner.skinauto - enables /skinauto command
Skinner.skincon - enables /skincon command
Skinner.skininv - enables /skininv command
Skinner.skinbase - for use of the /skinbase command
Skinner.skinteam - Allows the use of the /skinteam command
Skinner.skinall - for the use of the /skinall command
Skinner.skinrequest - enables /skinrequest
Cooldowns Permissions:
Cooldown settins can be adjusted via the plugin config. Applying the cooldown permission example skinner.default30 will enforce cooldowns on those with the permission. If no cooldown permission is applied no cooldowns will be enforced. If multiple cooldown perms are assigned to a single player they fastest cooldown will be used.
"Command based cooldowns ('permission' : 'command' seconds": {
"Default30CD": {
"skin": 30.0,
"skinitem": 30.0,
"skincraft": 30.0,
"skincon": 30.0,
"skininv": 30.0,
"skinteam": 30.0,
"skinbase": 60.0,
"skinall": 60.0
}
Admin Permissions:
Skinner.import – enables /Skinimport, /Colimport and /Skinrequests
Skinner.bypassauth - bypasses the building auth requirement when using /Skinitem
Skinner.permskintry - enables try feature when using /Skinrequests
Warning: trying a skin will make a copy of that item. Only give this perm to admins who are allowed to spawn items.
Other Permissions:
Skinner.skinautotoggled - applied when a player disables skinauto
Skinner.skinteamblock - applied when a player disables team skins
Skinner offers multiple ways of importing skins including via the config and through commands:
Importing via the config:
To import skins via the config insert workshopIDs into the imported skins list as per the code snippet below, once finished reload skinner and the shortname and displayname fields will be automatically populated. You can add extra skins at any stage using this method.
"Imported Skins List": {
"861142659": {},
"2617744110": {}
},
Optionally entire workshop skin collections can be added to conifg, each item skin is automatically imported to your imported skins list on plugin load.
"Import Skin collections (steam workshop ID)": [496517795,2921147807],
Importing via commands:
Commands can be used to edit the config options for imported skins and collections via RCON, chat commands and the f1 console. Commands include:
/Skinimport WorkshopID
/Colimport CollectionID
Importing via Skin Requests:
Players can requests skins to be added to the game using the skinrequests feature. By using the command /skinrequest WorkshoID a skin gets automatically uploaded to the skin requests box. Admins with the skinner.import permission can open the requests box with the /skinrequests command.
Skins from the request box can then be "tried" approved or denied.
Each skin requested can be logged to discord using the webhook in the config.
Importing from other plugins:
Skinner now has a tool for windows to import data from skinbox, xskins and skincontroller. Simply select your json data file with imported skins into the tool and copy the new imported skins list into the skinner config.
https://github.com/Whispers88/SkinDataConverter/releases/tag/Main
Note: The "Imported Skins (skinid : 'shortnamestring', skinid2 : 'shortnamestring2'": {}" is now redundant and automatically converted to imported skins list.
{
"Skin Commands (skin items in you inventory": [
"skin",
"s",
"skinbox",
"sb"
],
"Skin Items Commands (skin items you have already placed": [
"skinitem",
"si",
"skindeployed",
"sd"
],
"Set default items to be skinned": [
"skincraft",
"sc"
],
"Automatically set all items in you inventory to your default skins": [
"skininv",
"sinv"
],
"Automatically set all items a container to your default skins": [
"skincon",
"scon"
],
"Automatically skin all deployables in your base": [
"skinbase",
"skinbuilding"
],
"Automatically skin all items in your base": [
"skinall",
"sa"
],
"Automatically skin all items that are moved into you inventory": [
"skinauto",
"sauto"
],
"Skin your teams inventories with your skin set": [
"skinteam",
"st"
],
"Request workshop skins via workshop ID": [
"skinrequest",
"sr"
],
"Approve workshop skin requests": [
"skinrequests",
"srs"
],
"Set your selected skin set": [
"skinset",
"ss"
],
"Import Custom Skins": [
"skinimport",
"sip"
],
"Import Workshop Collection Command": [
"colimport",
"cip"
],
"Skin Request Notification Discord Webhook": "",
"Custom Page Change UI Positon anchor/offset 'min x, min y', 'max x', max y'": [
"0.5 0.0",
"0.5 0.0",
"198 60",
"400 97"
],
"Custom Searchbar UI Positon anchor/offset 'min x, min y', 'max x', max y'": [
"0.5 0.0",
"0.5 0.0",
"410 635",
"572 660"
],
"Custom Set Selection UI Positon anchor/offset 'min x, min y', 'max x', max y'": [
"0.5 0.0",
"0.5 0.0",
"250 610",
"573 633"
],
"Auto import approved skins": true,
"Remove player data after inactivity (days)": 14,
"Apply names of skins to skinned items": true,
"Add Search Bar UI": true,
"Use on itemcraft hook (skin items after crafting - not required when using skinauto)": false,
"Override spraycan behaviour": false,
"Use spraycan effect when holding spraycan and skinning deployables": true,
"Blacklisted Skins (skinID)": [],
"Blacklisted Itemms (itemID)": [],
"Import Skin collections (steam workshop ID)": [],
"Command based cooldowns ('permission' : 'command' seconds": {
"Default30CD": {
"skin": 30.0,
"skinitem": 30.0,
"skincraft": 30.0,
"skincon": 30.0,
"skininv": 30.0,
"skinteam": 30.0,
"skinbase": 60.0,
"skinall": 60.0
}
},
"Imported Skins List": {}
}
//Get all Cached skins
public Dictionary<int, List<ulong>> GetAllCachedSkins()
{
return _cachedSkins;
}
//Check if skin is a Redirect item
public bool IsRedirectID(ulong uID)
{
return HasMask(uID);
}
//Convert Redirect ID to item ID
public int RedirectIDtoItemID(ulong uID)
{
return (int)UnsetMask(uID);
}
//Get a list of skins for a particular item
public List<ulong>? GetSkinsItemList(int itemid)
{
_cachedSkins.TryGetValue(itemid, out List<ulong>? cachedSkins);
return cachedSkins;
}
Well rounded shop, with various features. It's standalone plugin which is compatible with WelcomePanel, HumanNpc.
This plugin also supports selling commands, wipe block, no escape, sales, permission access.
Multi-currency support
Use different currencies for different items. Economics and ServerRewards (RP) is supported as well as scrap or any other ingame item.
Restrictions
Combat, raid, spawn and building block supported alongside with basic cooldowns and wipe block. NoEscape is required for combat and raid block.
Appearance
Simple and clean design to ensure smooth user experience for your players. Additionally Shop can be inserted into WelcomePanel to achieve "all in" server panel.
Customization
Widely customizable and feature rich Shop which will fit all needs of your community.
Field Tested
Plugin made by experienced developer, tested by hundreds of server owners and used by some big organizations.
Discord
Customer support available on discord,
Installation
- unzip downloaded package and place Shop.cs file into your plugin folder.
- after succesfuly loading the plugin, data folder oxide/data/Shop will be generated
- take data files provided in plugin package and drop them into your Shop data folder
After finishing these steps your shop is ready to used.
Server Currency
If you don't wish to use ingame items as currency make sure you use either Economics or ServerRewards as you currency management as only those two plugins are compatible with Shop. Default currency setting is Economics ("eco"), if you wish to change it navigate to "oxide/data/Shop/Items.json", open this file in some text editor (VSC recommended) and simply select "eco" and mass replace for desired value. (video here)
"eco" for Economics
"rp" for ServerRewards
"scrap" or any other ingame item
Shop Categories
To remove, change or add new categories open "oxide/data/Shop/Categories.json" file. There you will find all categories alongside with items lists. If you wish to remove certain items from category, just head over to item list and delete from there.
Items
Changing prices
In "oxide/data/Shop/Items.json" you will find every item with their properties, to quick search for specific items press "CTRL + F". By leaving BuyPrice or SellPrice at 0 you will disable selling or buying of said item. Due to multi-currency support prices can be set only in whole numbers, no decimals. To offset for this, you can set minimal amount requirement. For example instead of selling one piece of wood for 0.01$ you can set minimal amount of 100x wood for 1$.
Removing items
If you wish to remove some items from Shop, you can do that directly in "data/Shop/Categories.json" file. Removing items from "Items.json" is not needed as they have no effect unless they are listed in some category.
Adding new items
To add new item you must first head over to "Items.json" data file and create new entry by copy pasting some of the existing ones. Once done with that you can add the item into category. To add multiple versions of same item can be created by simply adding unique tag behind shortname, for example "rifle.ak{1}", "rifle.ak{2}", etc...
Commands
Adding new commands
Commands can be create at "data/Shop/Commands.json". Plugin can only run server side console commands and then parse steam id or player name with tags {steamid} and {playername}. There are two examples shown in default data file. Server side console commands are common thing and almost all plugins utilize them.
Listing commands in categories
Simply type in one of your command names into category item list like this "cmd/yourCommandName". Slash cmd in front of command name is there to make difference between ingame item and command.
Cooldowns
These are very basic, cooldown is triggered when buy/sell action is triggered. By using minimal amount requirement for items you can manage how much player buy and how often. Cooldowns are managed in "data/Shop/Cooldowns.json". Default data file contains two example of cooldowns but it's simply shortname and amount of seconds.
Restrictions
Raid and Combat Block
Managed by NoEscape plugin, option to enable these two block can be found in config file.
Building Block
Prevents players from using shop while they are building block, option can be found in config file.
Spawn Block
Prevents players from using shop after they respawn, amount of seconds can be set in config file, 0 = disabled.
Wipe Block
Prevents players from buying specific items after wipe. Settings are located in "data/Shop/ItemsWipeBlock.json", similar as cooldowns.
Sales
By Permission (config file)
Discount on every item in the shop assigned by permission, multiple permission can be created with their own discount values.
By Category (categories data file)
Discount for every item within specified category.
By Item
Discount for specific item in the shop. If item is already in discounted category, higher discount will be applied.
WelcomePanel integration
To integrate this plugin into WelcomePanel simply use one of the four configs included in download package. These config were premade for each WelcomePanel template (goes from 1 to 4). In case you have own highly customized layout for WelcomePanel you will have to adjust "Layout Container" in Shop config file by yourself.
$24.99
IQWipeBlock – a reliable, time-tested plugin!
Many servers choose this plugin for temporary item blocking!
A large number of reviews, discussions, and updates throughout the plugin's existence!
I present to you the new version of the plugin!
Features List:
UI Interface:
Scrollable UI with support for pagination – add unlimited categories and items, everything is scrollable!
New notifications with animations – yes, animations in RUST! It's more than possible – try it yourself!
Configuration:
Simplified configuration – even a beginner admin can handle it. Everything is clear and easy to use!
Item Block Notification:
Simplified and familiar to players – GameTip style.
This is the built-in notification from Rust.
Welcome Notification:
When a player joins the server, they are greeted with an animated notification informing them about the current temporary item block.
Block End Notification:
As soon as the item block ends, all players receive a chat message.
Meanwhile, the plugin disables 90% of its functions to reduce server load, keeping only the essential ones!
Permissions:
iqwipeblock.ignore – ignore all item blocks
Galium — Anti-Cheat & Moderation Platform for Rust Organizations
Detection, intelligence, and enforcement — unified in one organizational dashboard.
Galium is a production anti-cheat service operating since 2022, built for Rust server organizations that need structured moderation at scale — across multiple servers, multiple staff teams, and high player volume.
Not a single plugin.
Operational infrastructure for Rust organizations.
Request Access Join Discord
Your browser does not support the video tag.
What Galium is
Galium is an anti-cheat at its core — designed to detect behavioral abuse through live production signals, risk modeling, and enforcement workflows.
Ahead of public launch, that proven detection foundation expanded into a full moderation and management platform — giving organizations one place to run their entire operational stack:
✓
Anti-cheat detection & risk scoring
✓
Teaming violation detection
✓
Toxicity and chat moderation
✓
Mute & ban management (history, reasons, evidence, traceability)
✓
Staff management & role-based permissions
✓
Organization & server management
✓
Automation rules and operational tooling
✓
Integrations (BattleMetrics + ecosystem-ready)
Galium doesn't replace "one feature."
It replaces fragmentation — plugins, spreadsheets, Discord-only logging, and inconsistent enforcement across servers.
Reputation and production history
Galium has been running in real competitive Rust environments since 2022 — refined through actual enforcement scenarios, edge cases, and the operational realities of moderating at scale.
Over years of production usage, Galium has:
✓
Processed millions of behavioral signals
✓
Evolved risk weighting through real-world outcomes
✓
Prioritized explainability and auditability, not black-box actions
✓
Maintained enforcement consistency across wipes, servers, and staff teams
This launch is not a new experiment — it's the public release of infrastructure that's already been proven in production.
Built for organizations, not single servers
Most "anti-cheat plugins" operate per server. Galium operates at the organization level. That means:
✓
One player identity across your entire org
✓
Risk follows the player, not the server they join
✓
Behavioral profiles persist beyond wipe cycles
✓
Policies and enforcement stay consistent across your infrastructure
✓
Staff actions and decisions are fully traceable across teams
No silos. No per-server blind spots. One structured organizational view.
Unified moderation control center
Galium centralizes your moderation stack into one dashboard — so your team can move fast without losing control.
Threat & moderation tools
Behavioral analytics and risk overview
Teaming detection and investigative context
Prioritized cases based on severity, frequency, and recency
Enforcement & logging
Ban history, mute history, and action timelines
Evidence linkage and structured reasons
Full audit trails across staff actions
Organization operations
Server management and org configuration
Staff roles, permissions, and governance
Subscription and infrastructure controls
Automation & integrations
Automation rules for repeatable enforcement
Sharing agreements and org-level controls
BattleMetrics integration + integration-ready architecture
Performance and infrastructure mindset
Galium is designed for high-population, high-activity environments.
✓
Detection and analysis are designed to avoid server-side performance degradation
✓
Signal processing and intelligence are built to scale with organizational concurrency
✓
Operational clarity is maintained even under peak load
✓
Performance integrity stays preserved — while visibility and enforcement improves.
Structured moderation at scale starts here
If you operate multiple Rust servers and require centralized visibility, cross-server risk intelligence, and controlled enforcement — Galium provides the infrastructure to support it.
Request Access Join Discord
Production anti-cheat since 2022 • Built for Rust server organizations
Welcome to "Decay: The Last Haven," a custom map for the game RUST that immerses players in a post-apocalyptic world where survival is a luxury. This expansive map, with a size of 4500, boasts around 70,000 prefabs, creating a rich and detailed environment. It's fully compatible with BetterNPC plugins(Config for bots in the file), and Train Homes, featuring three stations for the plugin. The map showcases a double-track surface railway, offering two metro entrances with separate branches for spawning trains, complemented by an intricate underground railway system.
The layout includes evenly spaced monuments to optimize the FPS load for clients, ensuring smooth gameplay. Players can find custom building spots in the subway, marked as 'XU' on the minimap, amidst a network of bridges that are navigable by tugboats. The map's design incorporates a multitude of rivers, allowing tugboats and other water transport to access any point on the map with ease.
For those seeking a strategic advantage, the map presents custom monuments in ample quantity for a comfortable and engaging gaming experience. Builders will appreciate the custom sites, indicated by 'X' on the minimap, while the heart of the map features fresh water and lush vegetation, ideal for farmers.
Explorers can discover a large number of small settlements and standalone buildings, not marked on the road map, offering hidden gems throughout the landscape. Adventurous players can delve into underwater farm zones, denoted by 'O' on the minimap, and explore the depths of an underwater laboratory. To add to the excitement, the map is equipped with ziplines, providing a thrilling way to traverse this desolate yet captivating world.
"Decay: The Last Haven" is not just a map; it's a testament to the resilience of humanity in the face of desolation, offering a sanctuary for those brave enough to claim it.
Features:
Map size: 4500;
Prefabs count: ~65K;
Compatible with BetterNPC plugins (Config for bots in the file) & Train Homes ( 3 stations for plug-in );
Double-track surface railway with 2 entrances to the metro with separate branches for spawn trains;
Underground railway;
Evenly spaced monuments to spread the FPS load of client;
Custom places for building in the subway (XU on the minimap);
A lot of bridges ( The tugboat passes );
A large number of rivers, tugboats and other water transport can pass to any point on the map;
Designed custom monuments in sufficient quantity for a comfortable game;
Custom building sites (X on the minimap);
Fresh water and vegetation for farmers are in the center of the map;
A large number of small settlements/single buildings not marked on the road map by road;
Underwater farm zones (O on the minimap);
Underwater Laboratory;
Ziplines.
Custom monuments:
Nuclear Cargo;
Settlement;
Bandit Settlement;
Wood Industry;
Industrial Settlement;
Office Area;
Reverpost;
Shorpek;
Warehouse Settlement;
Bandit Ship;
Slave Ship;
Rebel Ship;
RW Station;
A large number of small settlements/single buildings not marked on the road map by road;
A lots custom places to build a base. ( "X"/"XU" on map );
Underwater farm zones ( "O" on map ).
Monuments:
Combined Outpost;
Launch Site;
The Dome;
Ziggurat;
PowerPlant;
JunkYard;
Harbor;
Airfield;
Arctic Research Base;
Desert Military Base;
Ferry Terminal;
Large fishing village;
Oxum`s Gas Station;
Abandoned supermarket;
Fishing villages;
Lighthouses;
Satellite Dish;
Nuclear Missile Silo;
Water Treatment Plant;
Train Yard;
Giant Excavator Pit;
Underwater laboratory;
Ranch;
Underground railway;
Quarries(HQM,Stone, Sulfur);
Large oilrig;
Oilrig.
My Discord: shemov
A password is attached to the map. You can edit it.
$26.49
IQTeleportation - is an advanced, optimized teleportation system that provides a wide range of features to improve player comfort and convenience.
Only the necessary, user-friendly features — the plugin isn’t overloaded with extras.
All capabilities are designed for stability and maximum player convenience.
Plugin Installation :
When you download the resource, you receive an archive with plugins and data folders.
Move the file from data strictly following the archive path: oxide/data/IQSystem/IQTeleportation.
If any of these files don’t exist on your server, create them.
Move IQTeleportation.cs from plugins strictly following the archive path: oxide/plugins.
Note for users who use a “web editor” on hosting panels.
Before uploading, unpack the archive locally in any convenient place, then upload the files from there.
Feature List :
Minimalist UI for the player :
The plugin supports UI for teleport requests and for setting a home point. These are optional and configured in the config.
Teleport directly into vehicles :
Optional feature.
Allows accepting a teleport while controlling a vehicle. The player will be teleported into a free seat; if there are no free seats, the teleport is canceled.
Sound effects :
Built-in sound effects for teleportation.
Players can feel the timer through sound: as teleport time approaches, the sound frequency increases.
This makes it clear when a teleport to a friend or home point will occur, without distracting from gameplay and keeping focus.
Home points on G-Map :
Optional feature.
Displays the last 6 home points the player teleported to directly on the G-Map, with the ability to teleport to them via the UI.
It fits the Rust and G-Map style nicely and is very convenient for players!
Teleport requests via G-Map :
Now you can simply right-click on a friend’s nickname (or near it) on the G-Map, and a teleport request will be sent automatically.
This helps players stay focused on gameplay and simplifies team interactions.
Automatic teleport between friends :
The plugin supports automatically accepting teleport requests from friends.
This feature can be toggled with the /atp command.
Players in a team no longer need to confirm requests manually — friend teleports will happen automatically, making co-op play even more comfortable.
Block teleporting from monuments :
You can forbid teleporting from specific monuments.
This improves gameplay and prevents using monument structures as a hideout followed by teleporting away from an opponent, creating a more balanced experience for everyone.
Home point marker :
After setting a home point, the player automatically gets a duplicate marker with the point’s name on their G-Map.
This improves visibility, helps orientation, and simplifies coordination with home points.
A temporary mark with a visual effect is also shown at the placement location.
Simplified commands :
The goal is to simplify usage and add convenience for players — commands weren’t overlooked:
/sethome has a shorter alias /sh
/removehome has a shorter alias /rh
/tpr has “built-in memory,” making player interaction easier.
You no longer need to specify a nickname every time you send a teleport request.
The command remembers the last player you teleported to, and when you run /tpr again without a name, it will send the request to that player.
This makes teleporting even faster and more convenient.
See the full command list in the “Commands” section.
WARP system :
The plugin includes a warp system with multiple points and convenient commands.
What is this system for?
For example, you want players to teleport to Outpost (or any other monument) with /compound — you can do this with the system: just create the points, and the commands will be registered automatically and will persist every server wipe!
Other uses?
Use it however you like: for events, create a teleport point for the event, then remove the warp after it’s over.
Points placed outside standard monuments will not be saved after a map change.
Logging system :
If you want to monitor the plugin and know about your players’ teleports to analyze activity, there’s an optional logging feature for teleport requests, accepted teleports, and home teleports.
There are many simple, clear configuration options — you can preview them in the “Configuration” section.
Permissions :
iqteleportation.gmap — permission to use /gmap and instant admin teleports via G-Map to any point on the map
iqteleportation.tp — permission to use /tp for instant teleport to a player
iqteleportation.warpadmin — for using WARP features and the /warp command
These permissions are intended for administrators only and do not affect player features.
Do not grant them to regular players!
Command List :
Chat Commands :
/atp – toggle automatic acceptance of teleport requests from friends
/sethome Name – set a home point at your current position
/sh Name – shorthand alias for /sethome
/removehome Name – remove a previously set home point
/rh Name – shorthand alias for /removehome
/home NameHome – teleport to your home point
/home NameHome FriendName – teleport to a friend’s home point
/homelist – view all your home points
/tpr Name – send a teleport request to a player
/tpr – send a teleport request to the last player who accepted your request
/tpa – accept a teleport request
/tpc – cancel a teleport request
Warp System :
/warp list – show all available warps
/warp points WarpName – show all teleport points for the specified warp
/warp add WarpName – create a new warp or add an extra teleport point to that warp
/warp edit WarpName PointNumber – edit a specific teleport point for the warp
/warp remove WarpName – remove the warp and all its teleport points
/warp remove WarpName PointNumber – remove the specified teleport point of the warp
/NAMEWARP – command to teleport to a warp; created automatically based on your warp name
For Administrators :
/gmap – enable teleporting to any position via G-Map by right-clicking the map
/tp Name – instantly teleport to a player
/tp Name NameTwo – instantly teleport player “Name” to player “NameTwo”
/mblock – block teleportation from the monument where the admin is currently standing
/a.home points NameOrID – show all named home points of the specified player
/a.home clear NameOrID – delete all home points of the specified player
Console Commands :
atp – toggle automatic acceptance of teleport requests from friends
sethome Name – set a home point at your current position
sh Name – shorthand alias for sethome
removehome Name – remove a previously set home point
rh Name – shorthand alias for removehome
home NameHome – teleport to your home point
home NameHome FriendName – teleport to a friend’s home point
homelist – view all your home points
tpr Name – send a teleport request to a player
tpr – send a teleport request to the last player who accepted your request
tpa – accept a teleport request
tpc – cancel a teleport request
For Administrators :
gmap – enable teleporting to any position via G-Map by right-clicking the map
tp Name – instantly teleport to a player
tp Name NameTwo – instantly teleport player “Name” to player “NameTwo”
Configuration :
{
"General plugin settings": {
"Log player actions to file (true = yes / false = no)": false,
"Use sound effects (true = yes / false = no)": true,
"Use GameTip messages instead of chat (true = yes / false = no)": false,
"Wake the player immediately after teleport (otherwise they remain 'sleeping') (true = yes / false = no)": false,
"List of monuments where teleportation is forbidden (applies to home points / teleport-to-player / warps)": [],
"IQChat settings": {
"IQChat : Custom prefix in the chat": "[IQTeleportation]",
"IQChat : Custom avatar in the chat (Steam64ID) (If required)": "0"
},
"SimpleStatus settings": {
"SimpleStatus: Enable plugin support": false,
"SimpleStatus: UI settings for teleportation": {
"SimpleStatus: Background panel color": "0.3 0.3 0.3 0.5",
"SimpleStatus: Prefix translations [LanguageKey] = Text": {
"ru": "Телепортация",
"en": "Teleporation"
},
"SimpleStatus: Prefix color": "0.5647059 0.5490196 0.5333334 1",
"SimpleStatus: UI sprite": "assets/icons/stopwatch.png",
"SimpleStatus: Sprite color": "0.5647059 0.5490196 0.5333334 1"
}
}
},
"Teleport-to-player settings": {
"Teleport request settings": {
"Offer to accept teleport requests in the UI (true = yes / false = no)": true,
"Teleportation mode: true — teleport the player to the position where the request was accepted; false — teleport the player to the other player regardless of where it was accepted": false,
"Allow players to send teleport requests via G-Map (true = yes / false = no)": true,
"Use instant teleport to a point via G-Map (true = yes / false = no) (requires admin rights or the iqteleportation.gmap permission)": true,
"Disable teleportation features on the server (tpr and tpa will be unavailable) (true = yes / false = no)": false,
"Forbid sending and accepting teleport requests while the player is in a vehicle (true); otherwise teleport directly into the vehicle if a seat is free (false)": true,
"Block sending and accepting teleport requests in a safe zone (true = yes / false = no)": false,
"Block sending and accepting teleport requests during raid block (true = yes / false = no)": true,
"Block sending and accepting teleport requests while the player is in the subway (train tunnels) (true = yes / false = no)": true,
"Block sending and accepting teleport requests while the player is in the Underwater Lab (true = yes / false = no)": true,
"Block sending and accepting teleport requests while the player is on the Cargo Ship (true = yes / false = no)": true,
"Block sending and accepting teleport requests while the player is in a hot air balloon (true = yes / false = no)": true,
"Block sending and accepting teleport requests while the player is cold (freezing) (true = yes / false = no)": true,
"Block sending and accepting teleport requests while the player is swimming (true = yes / false = no)": true,
"Block sending and accepting teleport requests while the player is under radiation (true = yes / false = no)": true,
"Block sending and accepting teleport requests while the player is bleeding (true = yes / false = no)": true,
"Block sending and accepting teleport requests while the player is in another player's building privilege area (building blocked) (true = yes / false = no)": true,
"Allow teleportation only to friends (true = yes / false = no)": false
},
"Teleport-to-player cooldown settings": {
"Default count for players without permissions": 60,
"Count overrides for players with permissions [Permission] = Count": {
"iqteleportation.vip": 45,
"iqteleportation.premium": 35,
"iqteleportation.gold": 25
}
},
"Teleport-to-player countdown settings": {
"Default count for players without permissions": 20,
"Count overrides for players with permissions [Permission] = Count": {
"iqteleportation.vip": 15,
"iqteleportation.premium": 10,
"iqteleportation.gold": 5
}
},
"Teleport-to-player limit settings": {
"Use player teleport-to-player limits (true = yes / false = no)": false,
"Hours until player limits are reset": 24,
"Player teleport limit settings": {
"Default count for players without permissions": 15,
"Count overrides for players with permissions [Permission] = Count": {
"iqteleportation.vip": 20,
"iqteleportation.premium": 25,
"iqteleportation.gold": 30
}
}
}
},
"Home points settings": {
"Allow teleporting to a friend's home point (true = yes / false = no)": true,
"Enable UI with recent home points on G-Map (true = yes / false = no)": true,
"Offer setting a home point in the UI after placing a bed or sleeping bag (true = yes / false = no)": true,
"Allow players to teleport to a home point via G-Map (true = yes / false = no)": false,
"Block home teleports in a safe zone (true = yes / false = no)": false,
"Add a visual ping effect to the home point after it’s set (true = yes / false = no)": true,
"Add a marker on the player’s G-Map after setting a home (true = yes / false = no)": true,
"Permissions for setting home points": {
"Block setting a home point during raid block (true = yes / false = no)": true,
"Allow setting home points on tugboats (true = yes / false = no)": false,
"Allow setting home points only when building privilege is present (true = yes / false = no)": true,
"Allow setting home points only when authorized in the building privilege area (true = yes / false = no)": true
},
"Home point count settings": {
"Default count for players without permissions": 2,
"Count overrides for players with permissions [Permission] = Count": {
"iqteleportation.vip": 3,
"iqteleportation.premium": 4,
"iqteleportation.gold": 5
}
},
"Home teleport cooldown settings": {
"Default count for players without permissions": 30,
"Count overrides for players with permissions [Permission] = Count": {
"iqteleportation.vip": 25,
"iqteleportation.premium": 20,
"iqteleportation.gold": 15
}
},
"Home teleport countdown settings": {
"Default count for players without permissions": 20,
"Count overrides for players with permissions [Permission] = Count": {
"iqteleportation.vip": 15,
"iqteleportation.premium": 10,
"iqteleportation.gold": 5
}
},
"Home teleport limit settings": {
"Use player home-teleport limits (true = yes / false = no)": false,
"Hours until player limits are reset": 12,
"Home teleport limit settings": {
"Default count for players without permissions": 15,
"Count overrides for players with permissions [Permission] = Count": {
"iqteleportation.vip": 20,
"iqteleportation.premium": 25,
"iqteleportation.gold": 30
}
}
}
},
"Warp system settings": {
"Enable warp support (true = yes / false = no)": false,
"Block teleport to a warp if the player is hostile (safe-zone aggression) (true = yes / false = no)": true,
"Teleport-to-warp cooldown settings": {
"Default count for players without permissions": 120,
"Count overrides for players with permissions [Permission] = Count": {
"iqteleportation.vip": 100,
"iqteleportation.premium": 80,
"iqteleportation.gold": 60
}
},
"Teleport-to-warp countdown settings": {
"Default count for players without permissions": 30,
"Count overrides for players with permissions [Permission] = Count": {
"iqteleportation.vip": 25,
"iqteleportation.premium": 20,
"iqteleportation.gold": 15
}
},
"Permissions for teleporting to specific warps: [WarpKey] = Permission (otherwise available to everyone)": {
"warpName": "iqteleportation.warpPermission"
},
"Teleport-to-warp limit settings": {
"Use player teleport-to-warp limits (true = yes / false = no)": false,
"Hours until player limits are reset": 6,
"Teleport-to-warp limit settings": {
"Default count for players without permissions": 15,
"Count overrides for players with permissions [Permission] = Count": {
"iqteleportation.vip": 20,
"iqteleportation.premium": 25,
"iqteleportation.gold": 30
}
}
}
}
}
For Developers :
API :
private void ClearHomesPlayer(UInt64 userID, String pluginName)
// Clears all home points of the player.
private Boolean API_HavePendingRequest(BasePlayer player)
// Returns true if the player has an active (pending) teleport request.
private Dictionary<String, Vector3> GetHomes(UInt64 userID)
// Returns all home points of the player.
Hooks :
private Object CanTeleport(BasePlayer player)
// Called when attempting to teleport to a player.
// Return a string with the reason to cancel the teleport.
private Object canTeleport(BasePlayer player)
// Same as above (alternate hook name).
// Return a string with the reason to cancel the teleport.
private Object OnTeleportRequested(BasePlayer player, BasePlayer requester)
// Called when a teleport request is sent to a player.
// You can cancel by returning false (bool) or a String (your message).
private Object CanTeleportHome(BasePlayer player, Vector3 positionHome)
// Called when attempting to teleport home.
// You can cancel by returning a String with the reason.
private Object OnHomeAdd(BasePlayer player, String homeName, Vector3 positionHome)
// Called when attempting to set a home point.
// You can cancel by returning a String with the reason.
private void OnTeleportRejected(BasePlayer player, BasePlayer requester)
// Called when a teleport request to a player is canceled/rejected.
private void OnTeleportAccepted(BasePlayer player, BasePlayer requester, Int32 countdown)
// Called when a teleport request is accepted.
private void OnPlayerTeleported(BasePlayer player, Vector3 playerPos, Vector3 teleportationPos)
// Called after the player has been teleported.
private void OnHomeAccepted(BasePlayer player, String homeName, Int32 countdown)
// Called after the player has sent a teleport-home request.
private void OnHomeAdded(BasePlayer player, Vector3 positionHome, String homeName)
// Called after a home point has been set.
private void OnHomeRemoved(BasePlayer player, Vector3 positionHome, String homeName)
// Called after a home point has been removed.
private Object CanTeleportWarp(BasePlayer player)
// Called when a player tries to teleport to a warp.
// Return a string to cancel; return null to ignore (allow).
private Object CanTeleportHome(BasePlayer player, Vector3 positionHome)
// Called when a player tries to teleport to a home point.
// Return a string to cancel; return null to ignore (allow).
private Object CanTeleportPlayer(BasePlayer player)
// Called when a player tries to teleport to another player.
// Return a string to cancel; return null to ignore (allow).
private void OnPlayerTeleported(BasePlayer player, BasePlayer target)
// Called when a player has teleported to another player.
private void OnPlayerTeleportedWarp(BasePlayer player, Vector3 positionWarp)
// Called when a player has teleported to a warp.
private void OnPlayerTeleportedHome(BasePlayer player, Vector3 positionHome)
// Called when a player has teleported to a home point.
This is a complete pack with loot table, stacksizes, gathering, crafting time, smelt configs and data files.
choose your own plugins and don’t bother setting up the basics!
Save yourself the headache of manual balancing! Setting up a high-quality 2x server takes hours of fine-tuning. If the loot is too good, the wipe ends in a day. If the stacks are too small, players get frustrated.
This bundle provides the perfect "Vanilla+" core for your Rust server, with everything synced to work together perfectly.
This is a Plug & Play solution. No need to spend days editing JSON files – I’ve done the hard work for you.
What’s included in this bundle?
Custom BetterLoot v4 Config & Data: A completely overhauled loot table. No junk, balanced progression, and optimized for a 2x environment.
Perfected Gather Rates: 2x resources for wood, stone, metal, and sulfur, including pickups (hemp, berries, etc.) and quarries.
Synced Stack Sizes: Stack sizes are increased to match the 2x gather rate, ensuring a smooth inventory experience for your players.
Optimized QuickSmelt: Smelting speeds are adjusted to keep up with the faster resource gain (including electric furnance which alot of servers have problem with).
Half-Craft Configuration: 50% faster crafting times to maintain a great server tempo.
Why choose this bundle?
Time Saver: Skip days of configuration and testing.
Balanced Progression: Not too fast, not too slow—just the right 2x feel.
Performance Friendly: Clean configs that won't lag your server.
Tried & Tested: This setup is currently running on live servers with great player feedback.
This configuration is backed by consistent positive feedback and has been refined to ensure a stable, bug-free experience. Quality and reliability are my top priorities.
Loot table video :
Highest Rated
Top-rated picks trusted and loved by the community.
-
$16.99
By David
-
$40.00$30.00By nivex
-
$29.99$19.99By LosGranada
-
$29.99
By imthenewguy
-
$24.99
By Whispers88
-
$40.00$31.95By Mevent
-
Free
By Steenamaroo
-
$14.99
By AhigaO
-
$19.99$15.99By Fruster
-
$14.99
By David
-
$45.99$39.09By Monster
-
$19.99$15.99By Fruster
Trending Files
Popular picks members are downloading the most right now.
-
$40.00$30.00By nivex
-
Free
By Steenamaroo
-
$29.99
By imthenewguy
-
Free
By Adem
-
Free
By tofurahie
-
$35.00
By KpucTaJl
-
$16.99
By David
-
$24.99
By Whispers88
-
$40.00
By The_Kiiiing
-
$29.99
By Adem
-
$40.00$31.95By Mevent
Great Deals
Discounted picks, limited-time deals, and sale items worth grabbing now.
-
$24.95$21.95By Mevent
-
$25.00$20.00By Ionut Shiro
-
$3.99$1.99 -
$20.00$18.00By Razor
-
$8.00$6.40By Ionut Shiro
-
$24.99$19.99By SlayersRust
-
$8.00$6.40By Ionut Shiro
-
$9.98$7.48By Niko
-
$15.99$14.39By Khaled
-
$13.20$11.22By Shemov
-
$3.99$3.19By Ionut Shiro
Recently Updated
Recently improved files with fresh updates, fixes, and new content.
-
By mr_dead
-
$19.99
By imthenewguy
-
$19.99
By imthenewguy
-
Free
By imthenewguy
-
$19.99
By imthenewguy
-
$19.99
By imthenewguy
-
$19.99
By imthenewguy
-
$25.00
By CASHR
-
$33.00
By CASHR
-
$2.95
By imthenewguy
-
$19.99
By tril.
-
$23.00
By TF Crazy
Latest Reviews
See what customers are saying about their experience with files.
A great racetrack! Nice and wide to fit a variety of vehicles, was really easy to fit onto map and had all the expected layer masks ready to go. Love all the detail in the decoration outside of the track, this will be a favourite for players for sure!
My players think this content is quite challenging yet well-designed. They spend seven to eight hours every day mining sulfur to take part in the event.
My players really love the house designs he created. They keep asking me to buy new ones every time they're released.
Its a very nice Ui and useful tool. I am using it on my server and players like it very much..
Galium offers truly comprehensive help in the fight against the troublemakers none of us want on our servers.
You get a detailed explanation of what needs to be done and how everything works by the developers. I’d highly recommend that anyone running a server of any significance look into this.
Galium does not replace administrative work, but it makes it significantly easier - or rather, improves it. 🔨
Truly a real asset to your server. The support is also top-notch and very personable.
I got involved quite early on and was able to use it during a large part of the development process. You are encouraged to make suggestions for improvement, and—lo and behold—they actually get implemented.
Do not buy this in its current state
Works right out the box. Great for managing workshop skins.
Very cool. I'll be using this going forward.
5/5 ⭐⭐⭐⭐⭐ — Best Rust Leaderboard Plugin, Bar None
After trying several leaderboard solutions for my Rust server, RankEval is simply in a league of its own. The feature depth is incredible — 178+ tracked metrics, 12 gameplay pillars (not just kills!), EventMap 3D playback, seasonal challenges with live title holders, weapon mastery progression, career tracking across wipes, and a slick web integration that drops onto your site with just two lines of code. It covers every playstyle, from PvP